How to draw a cat portrait in coloured pencils
Creating art commissions is a truly unique thing. I love to give insight into how I create my commissions in the form of sharing progress pictures and videos with my clients. Be sure to follow me on Instagram/Facebook @jenniferstarnesart to see what projects I’m currently working on.
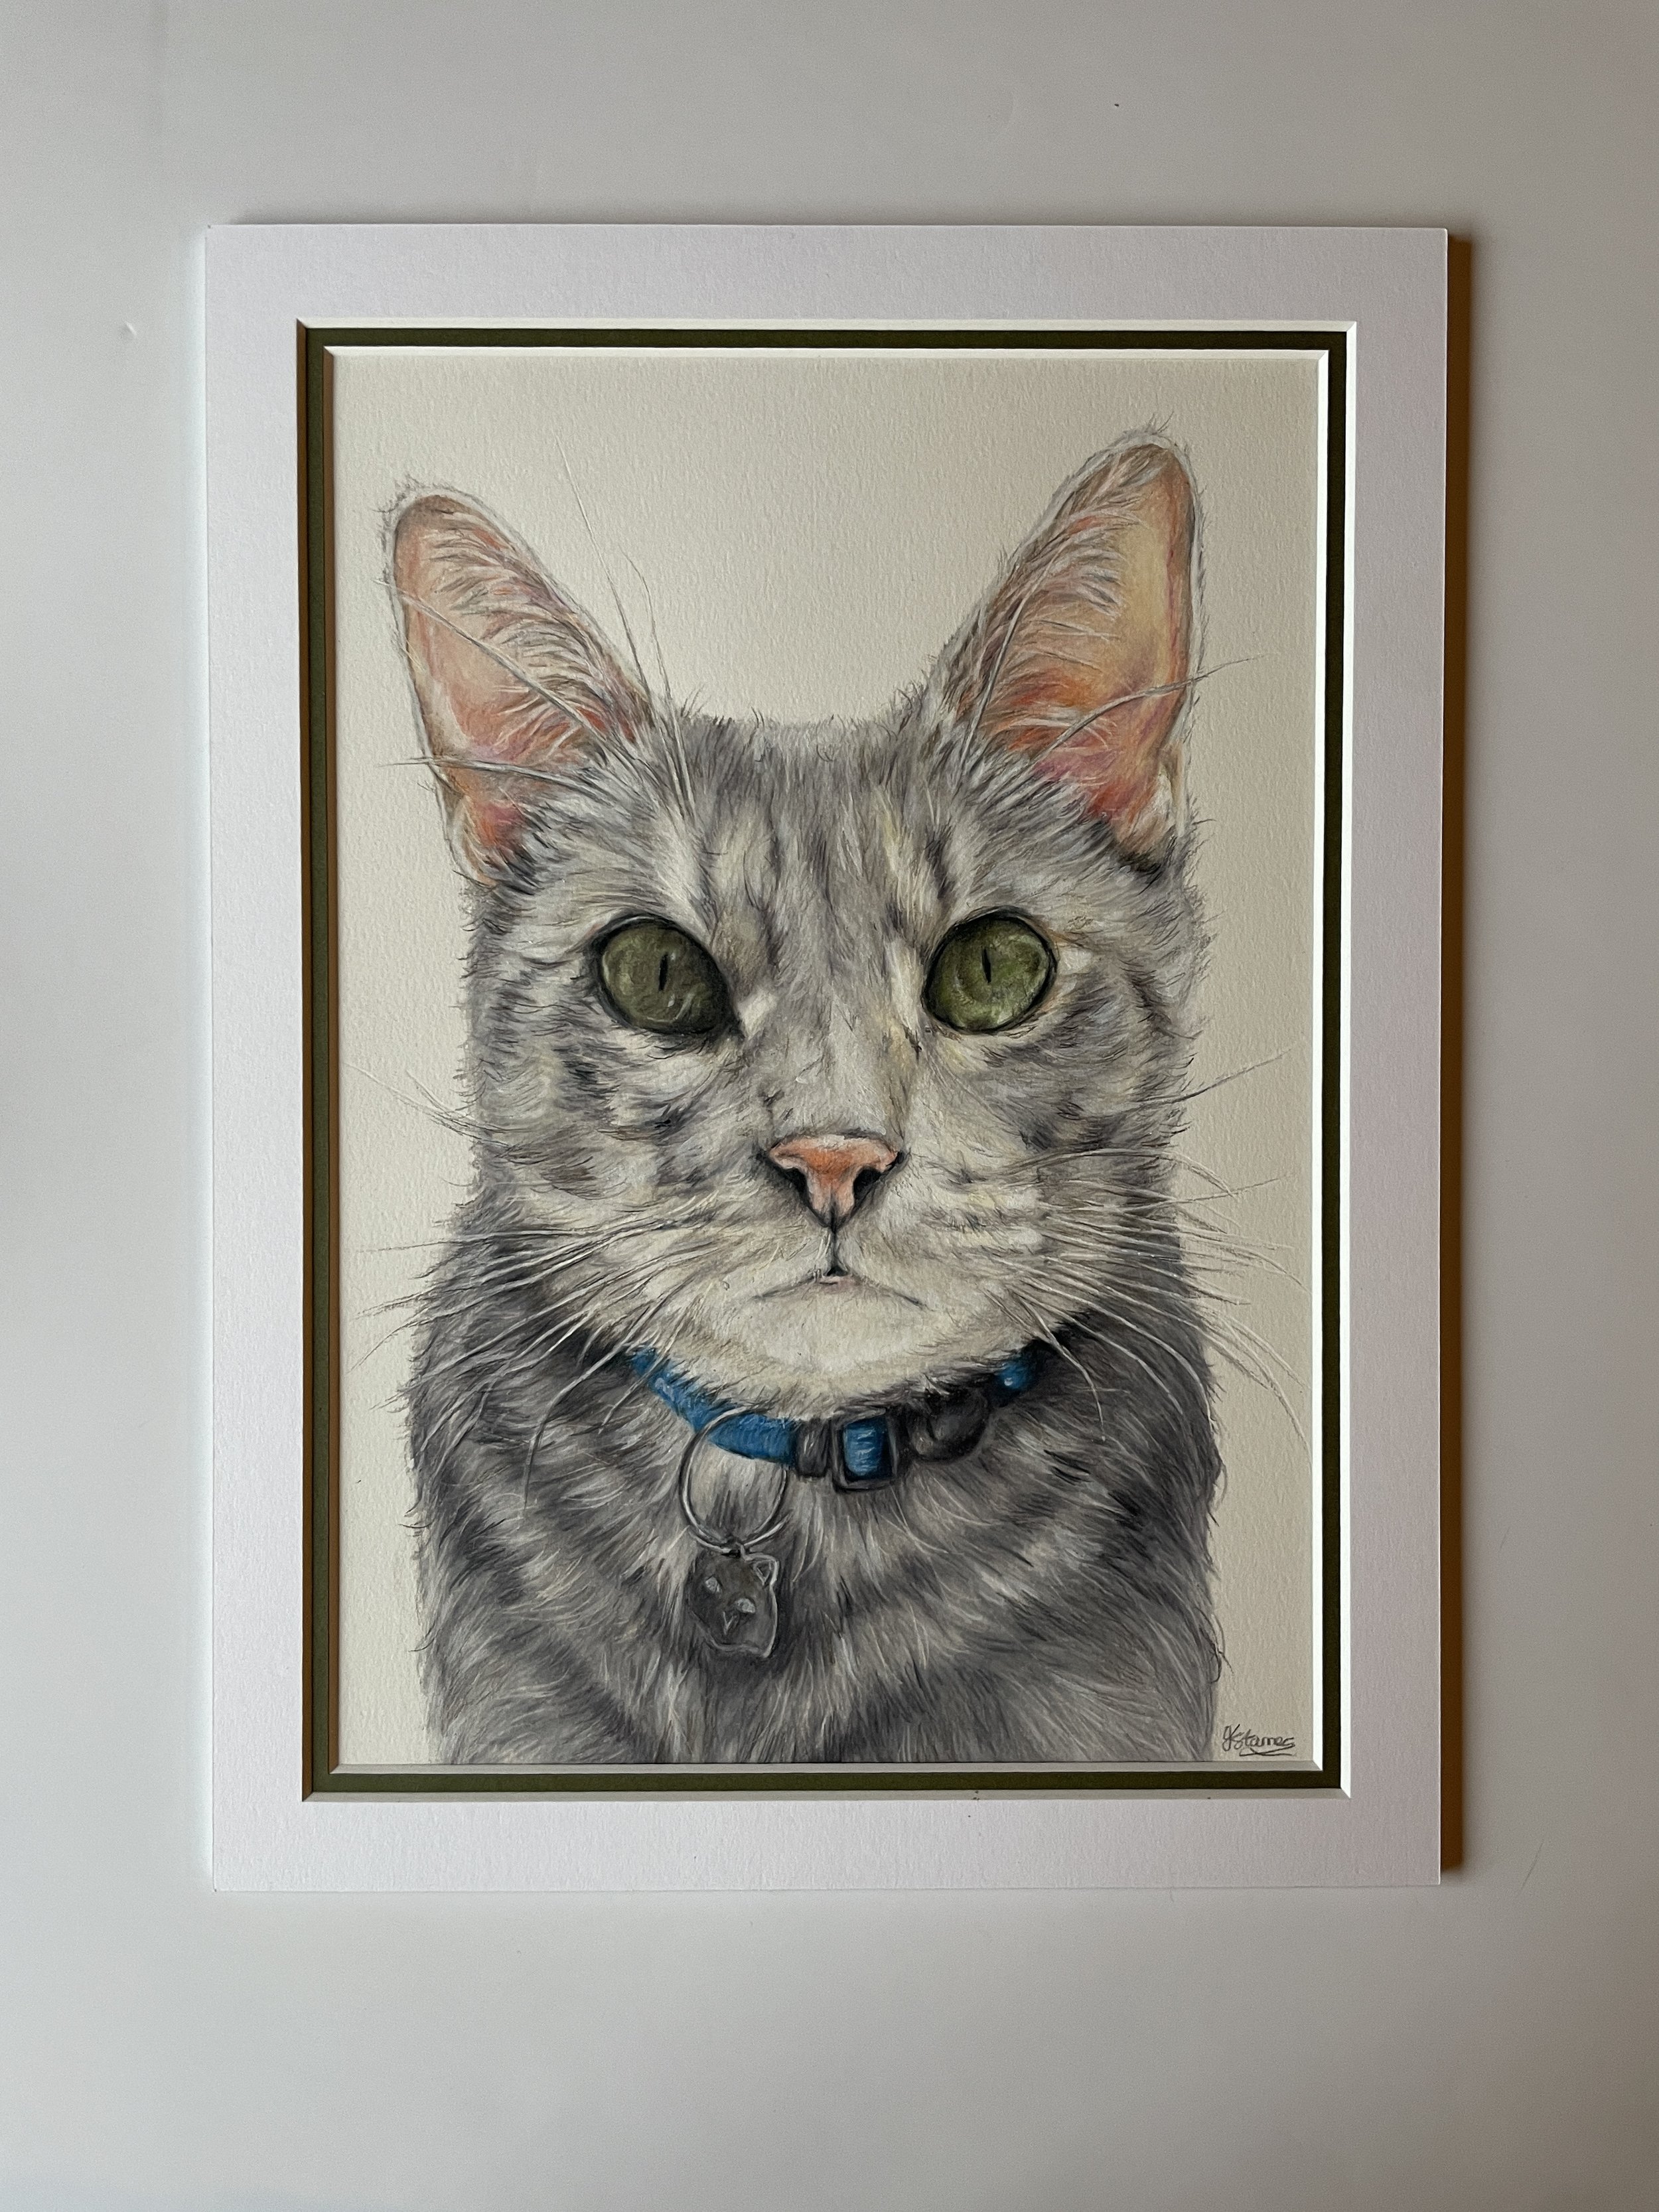
Within this blog post I’m going a step further by walking you through a behind-the-scenes process of how I drew this cat portrait in coloured pencils. This portrait is of Smokey, a private pet portrait commission for a client in USA. Towards the end I will share a few beautiful words that my client left me after she received the portrait. If you are an artist interested in finding out the exact materials I use for my coloured pencil artworks please click here.
Reference photo
I work from a variety of images to establish the most accurate fur colouring and detail. I like to make sure the reference photo shows the eye colouring clearly as this is typically a focal point for all my portraits. The eyes are the window to the soul!
Composition
I begin by choosing the main reference photo and sketching it out. I then create a digital mock up to show my client the double mount options (and frame in this case). Once my client approves the composition, I am ready to begin!

Preparing materials
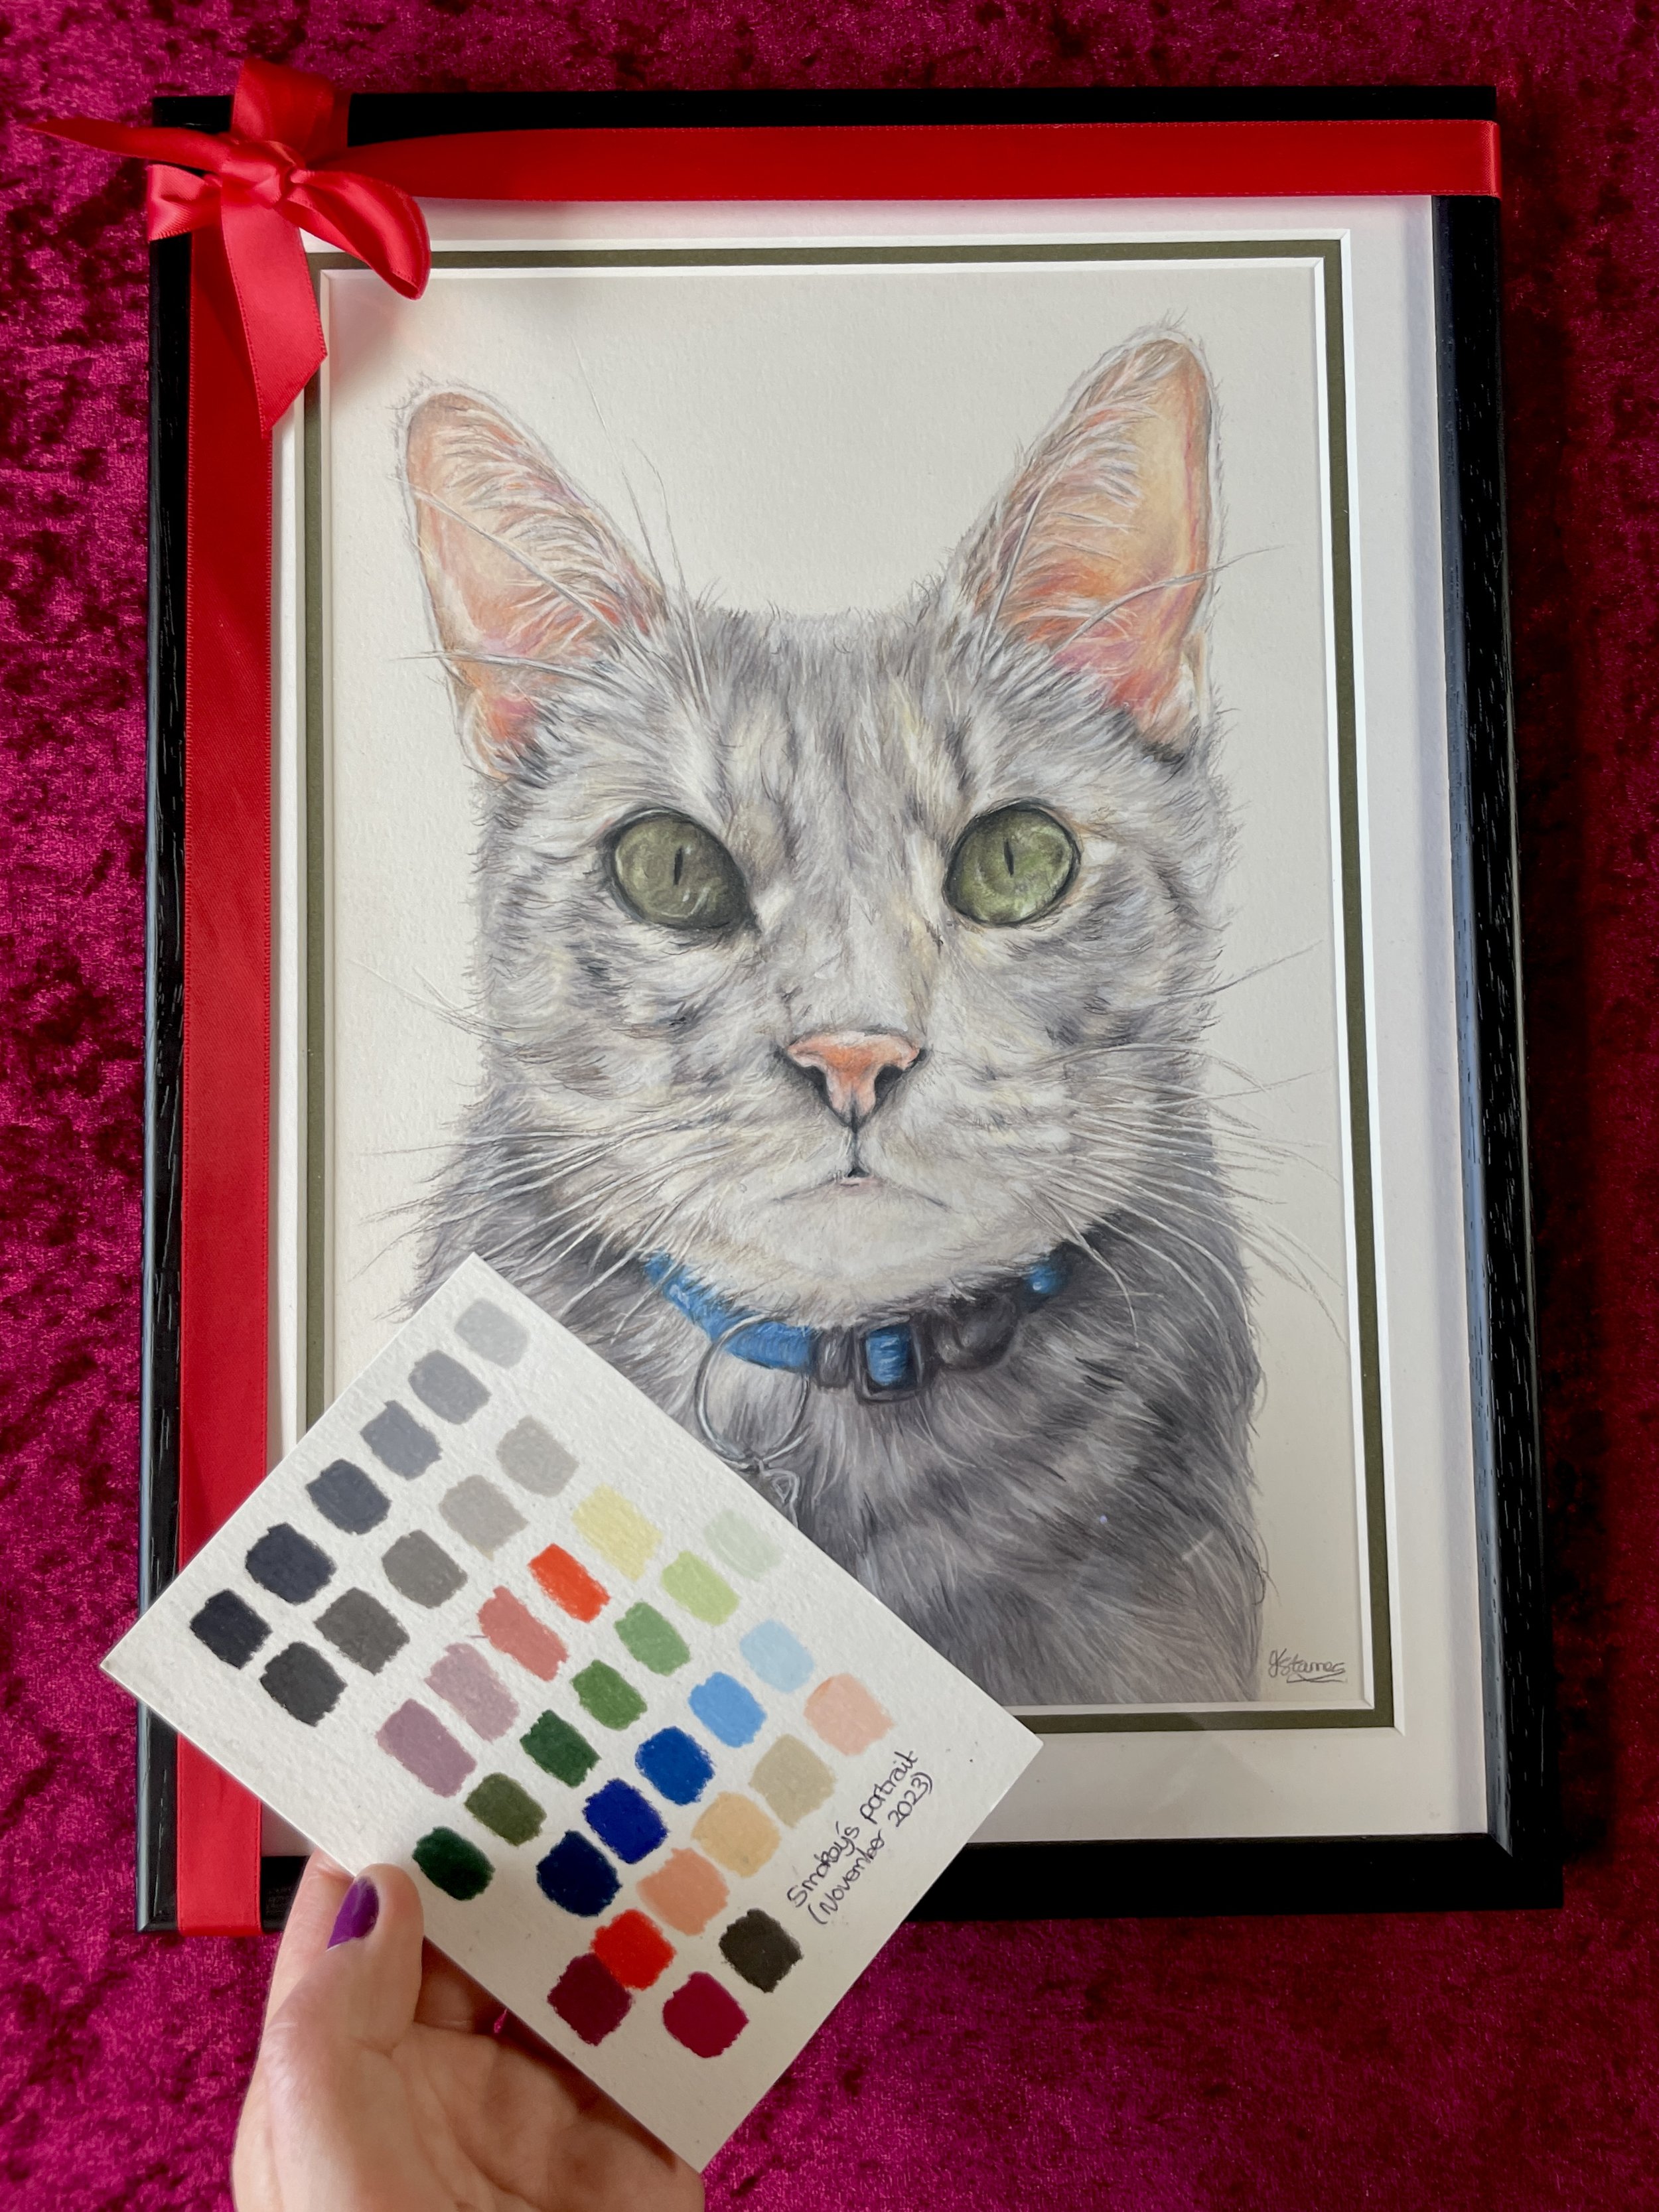
I lay out all my favourite drawing supplies and then use my colour swatch charts to pick out the coloured pencils I will be using for the portrait - I am able to do this by eye as I am experienced in identifying undertones. Utilising offcuts from my paper, I create a mini colour palette so I can easily and quickly refer back to see my chosen colour swatches. I include this colour palette with my portraits as an extra memento for my clients.

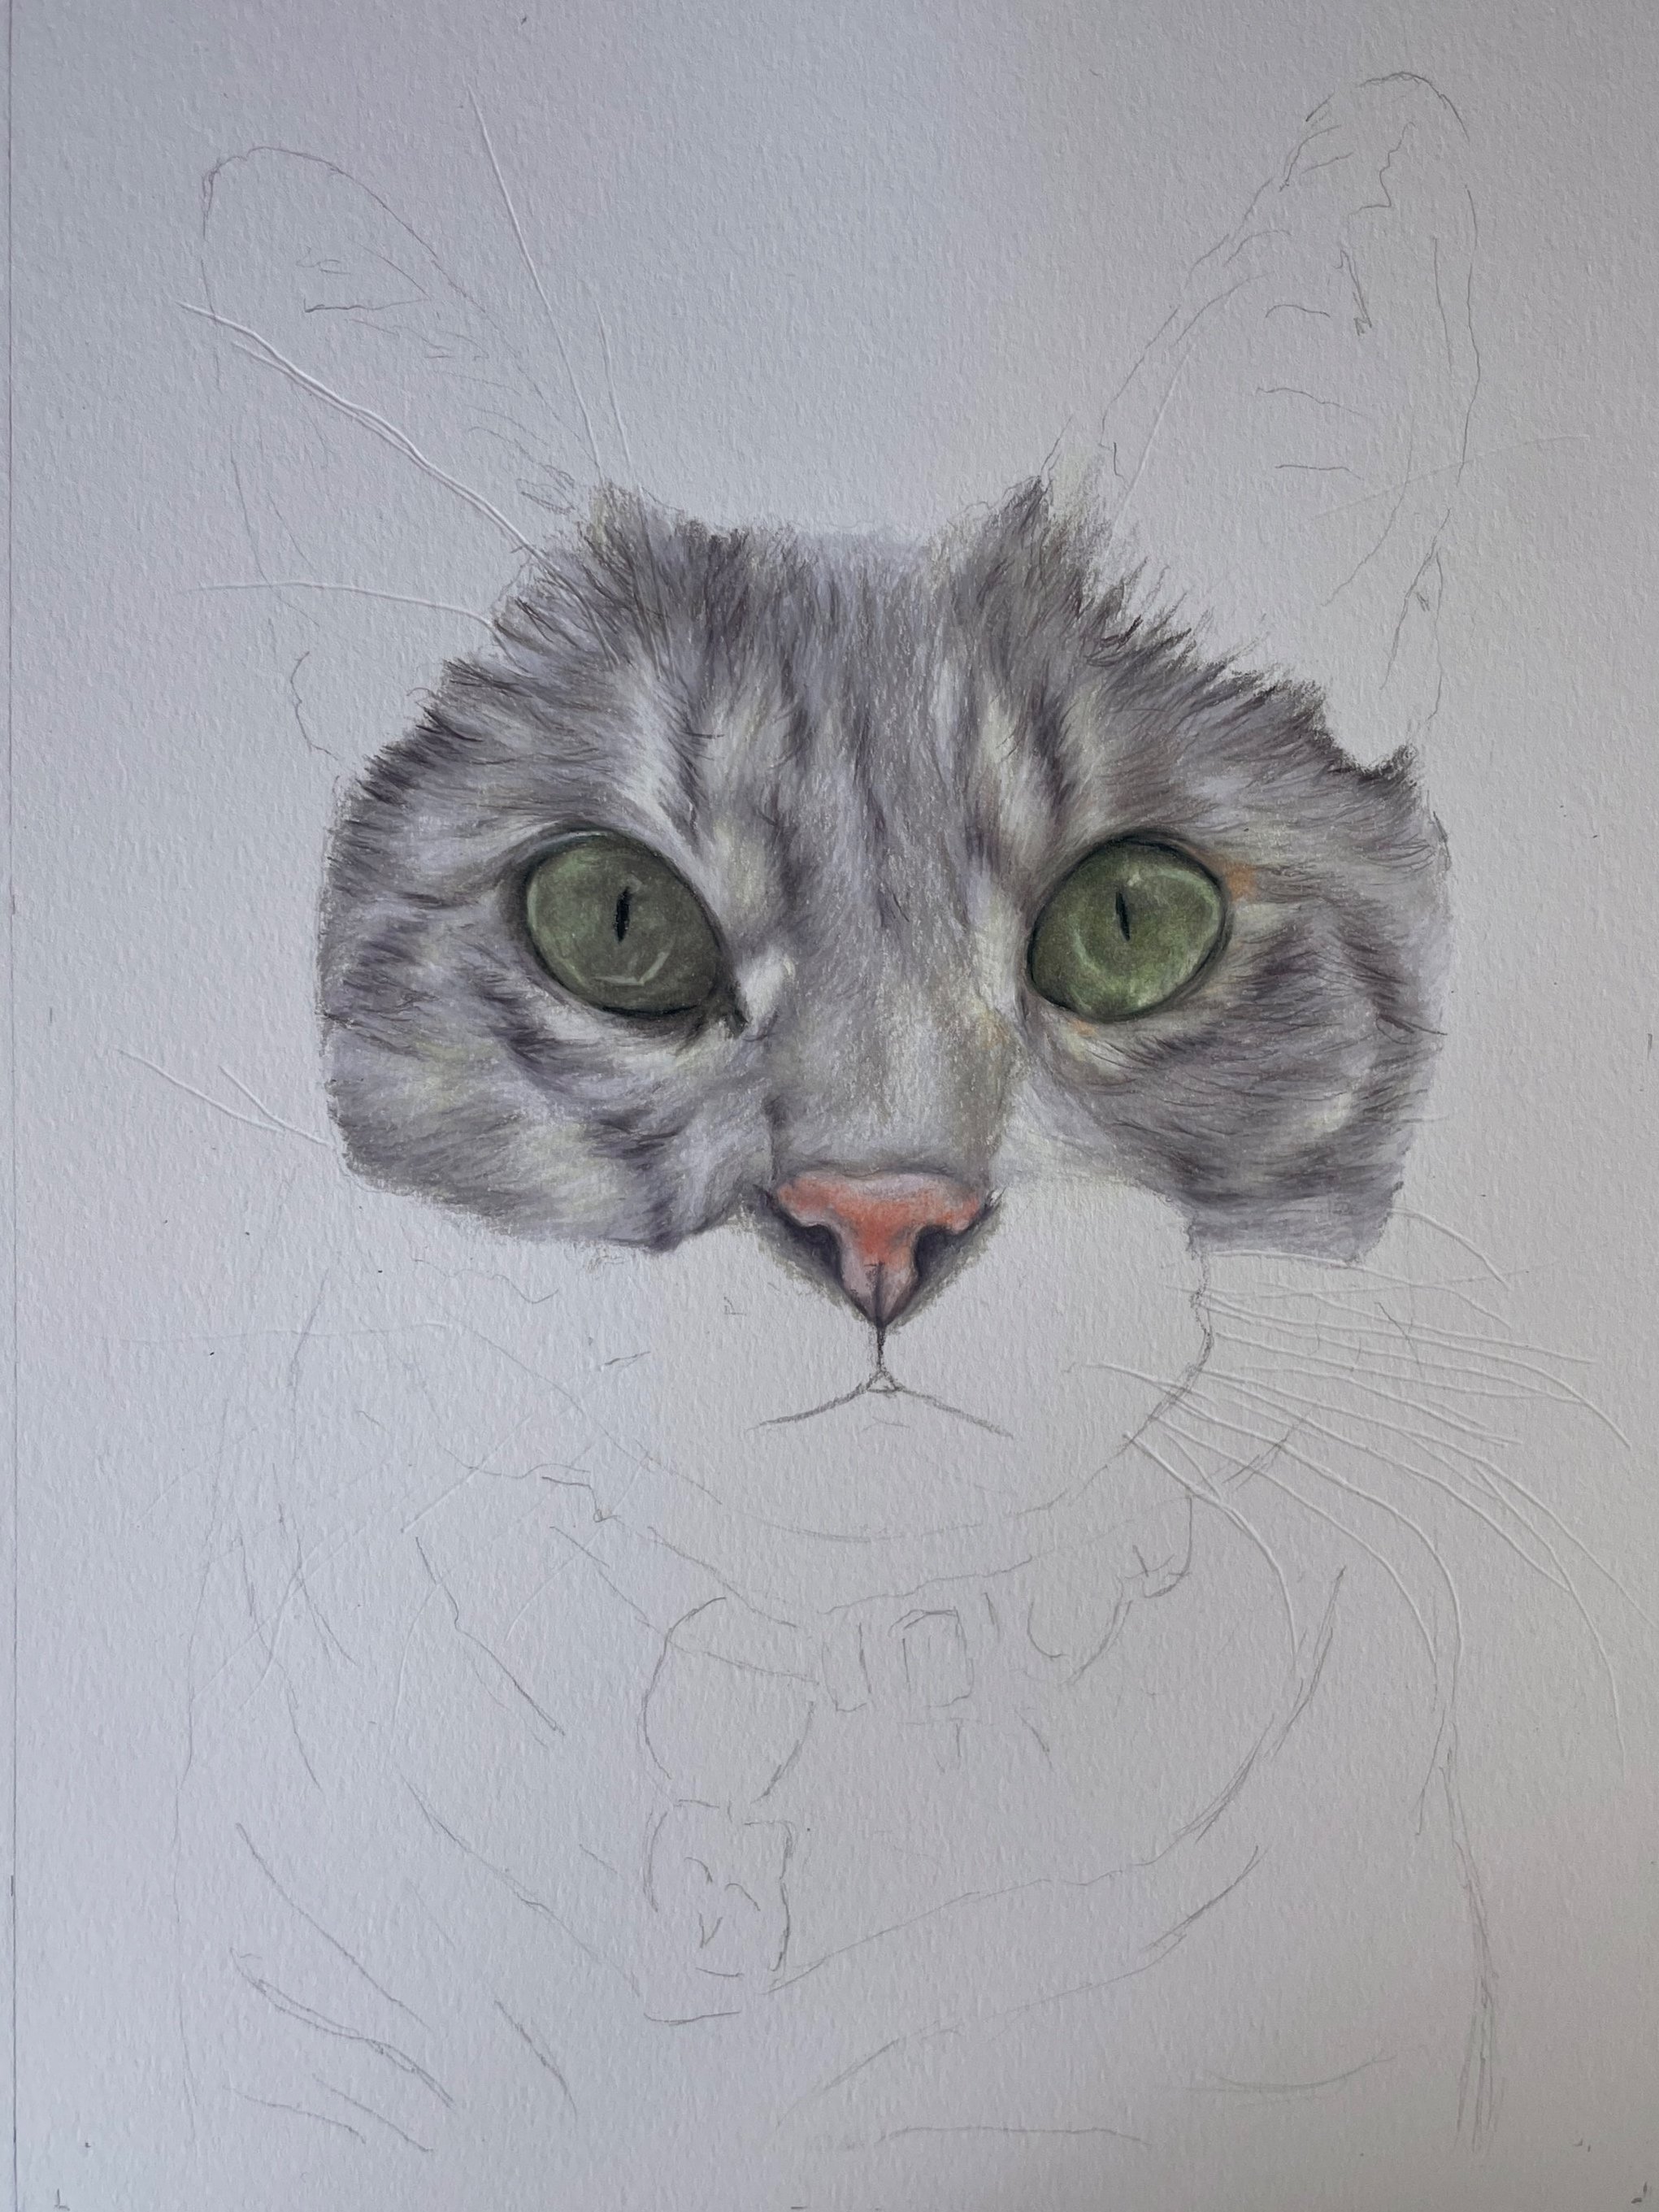
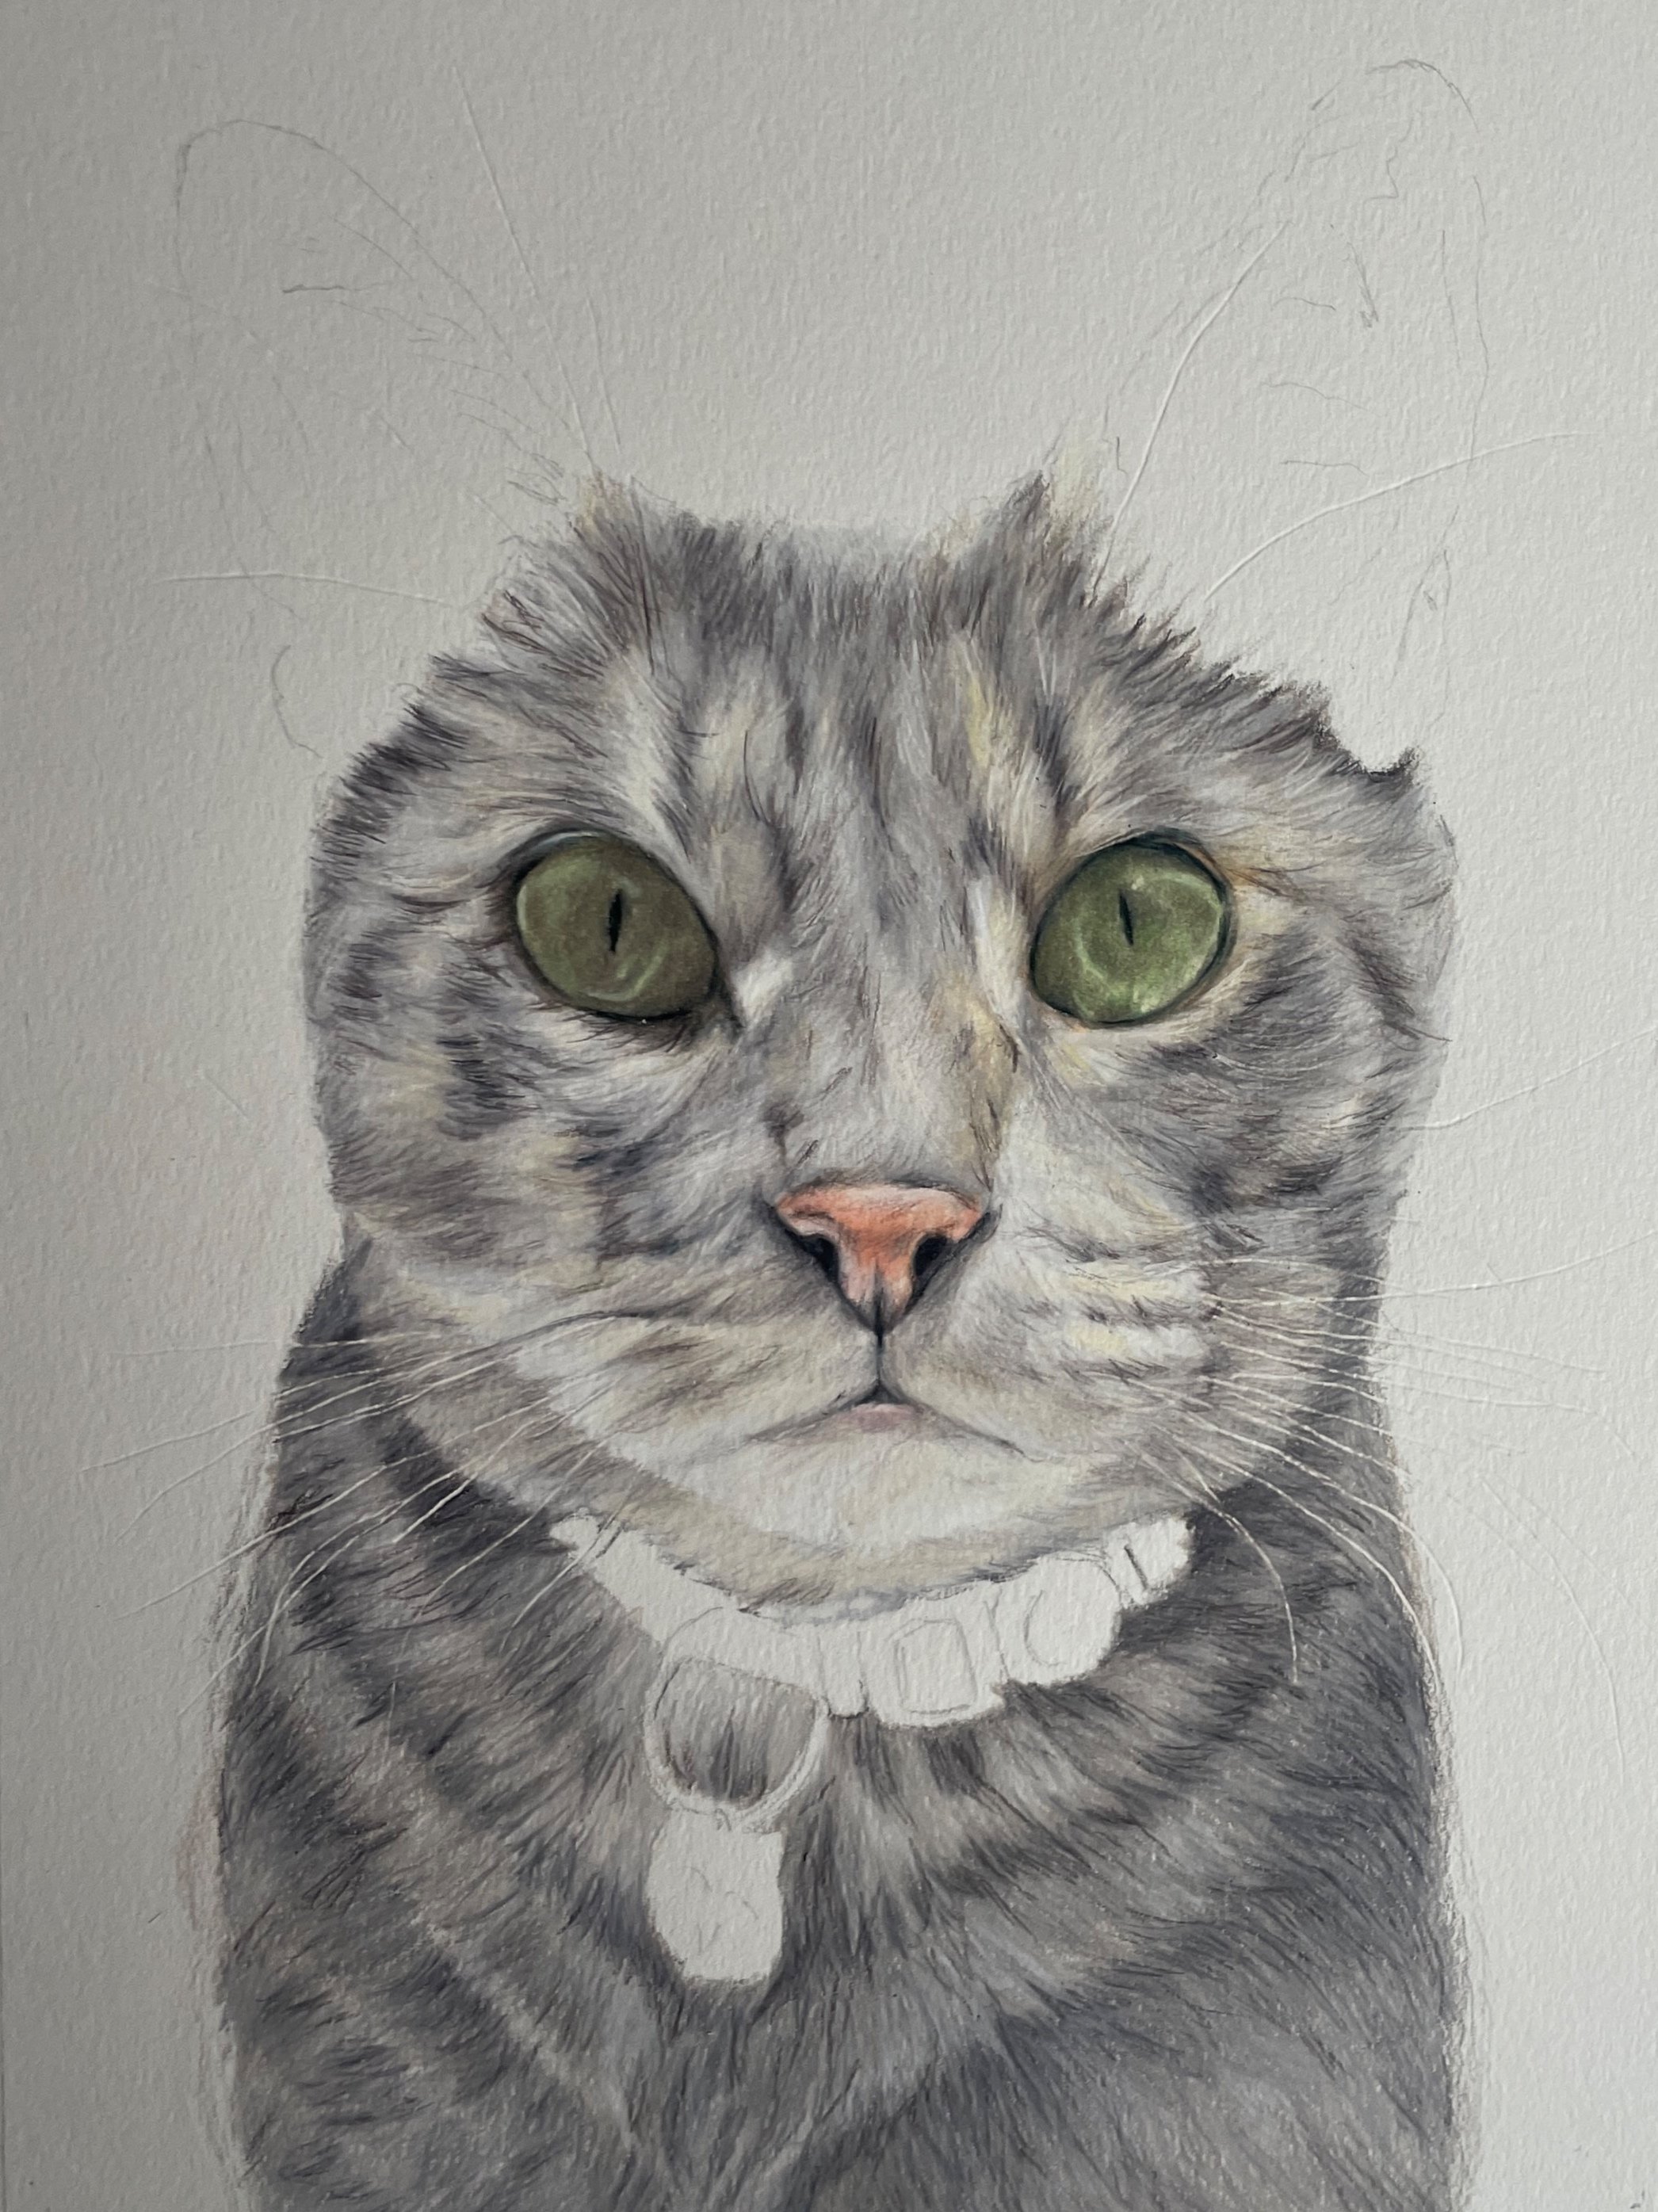
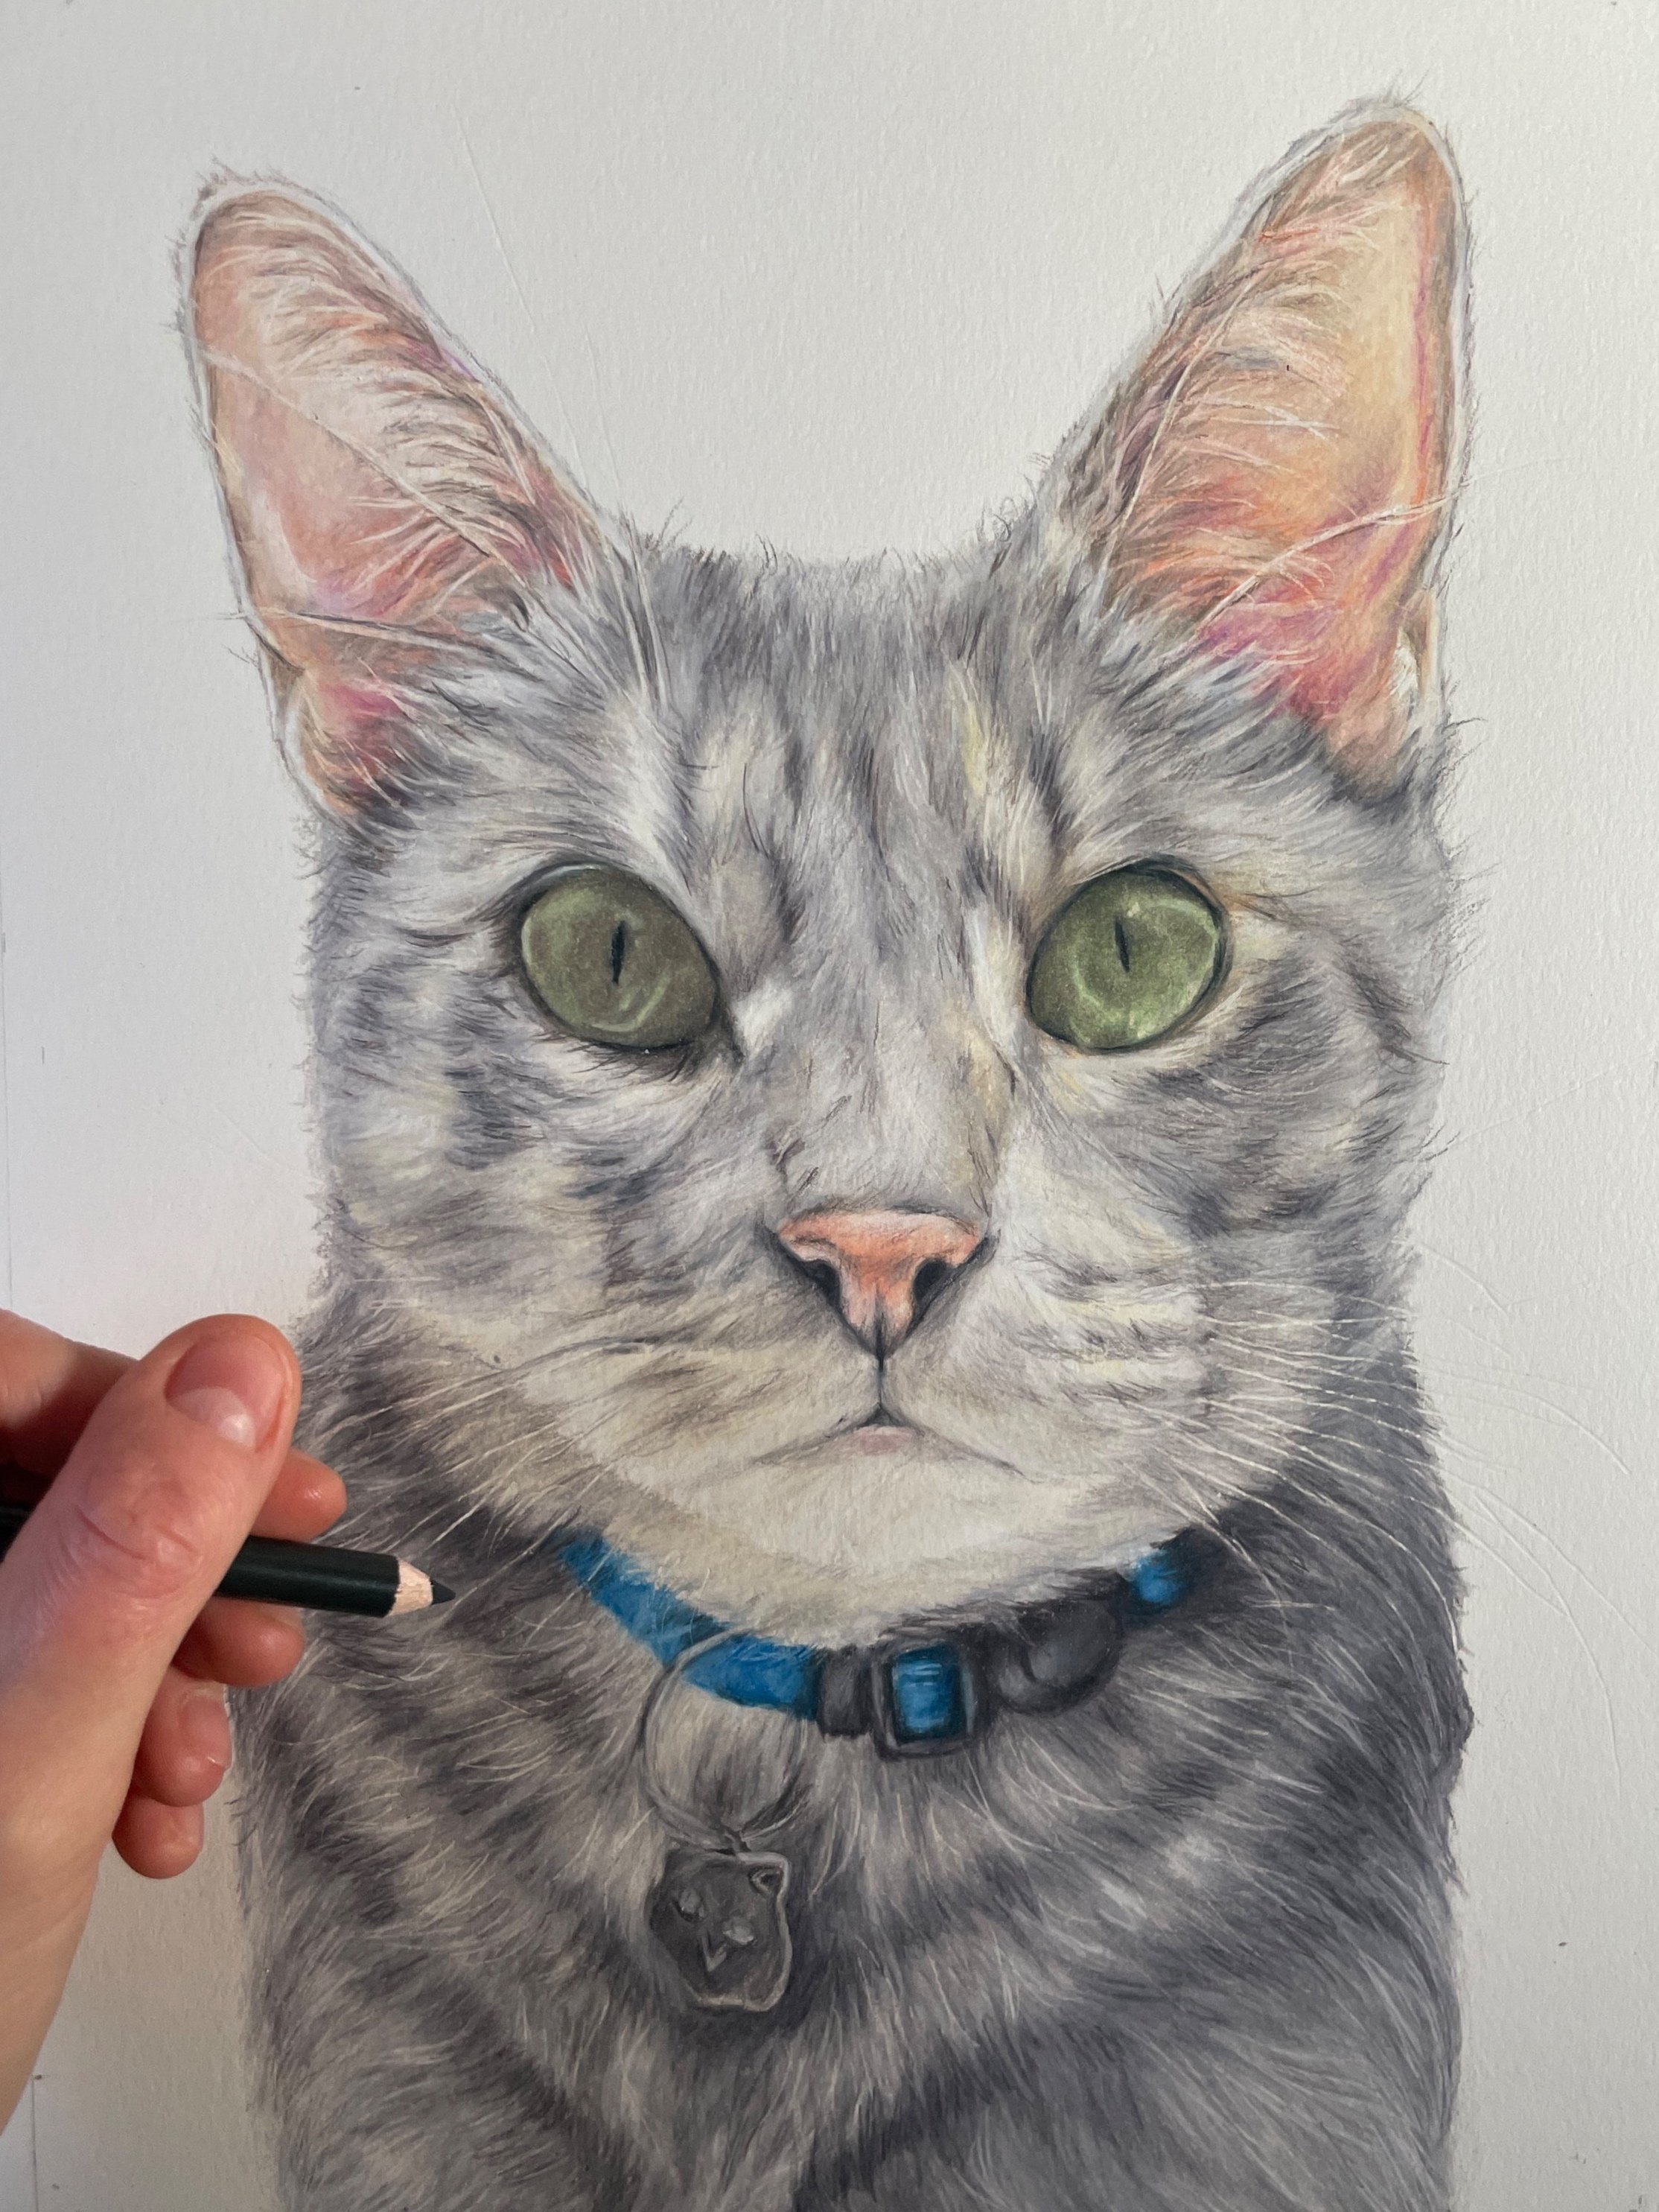
Drawing
As I’m left-handed, I usually work from right to left to reduce any chances of smudging. I establish the eyes quite quickly into the portrait as this helps to bring the portrait together. I find it helpful to work certain areas together in one session to create symmetry. To achieve depth I work in several layers, burnishing as I go to create a flawless blend, this process can take several days to weeks! For finishing highlights, I love to use liquid coloured pencil – this is highly pigmented and has the consistency of paint, so is an excellent choice for achieving fine whiskers.

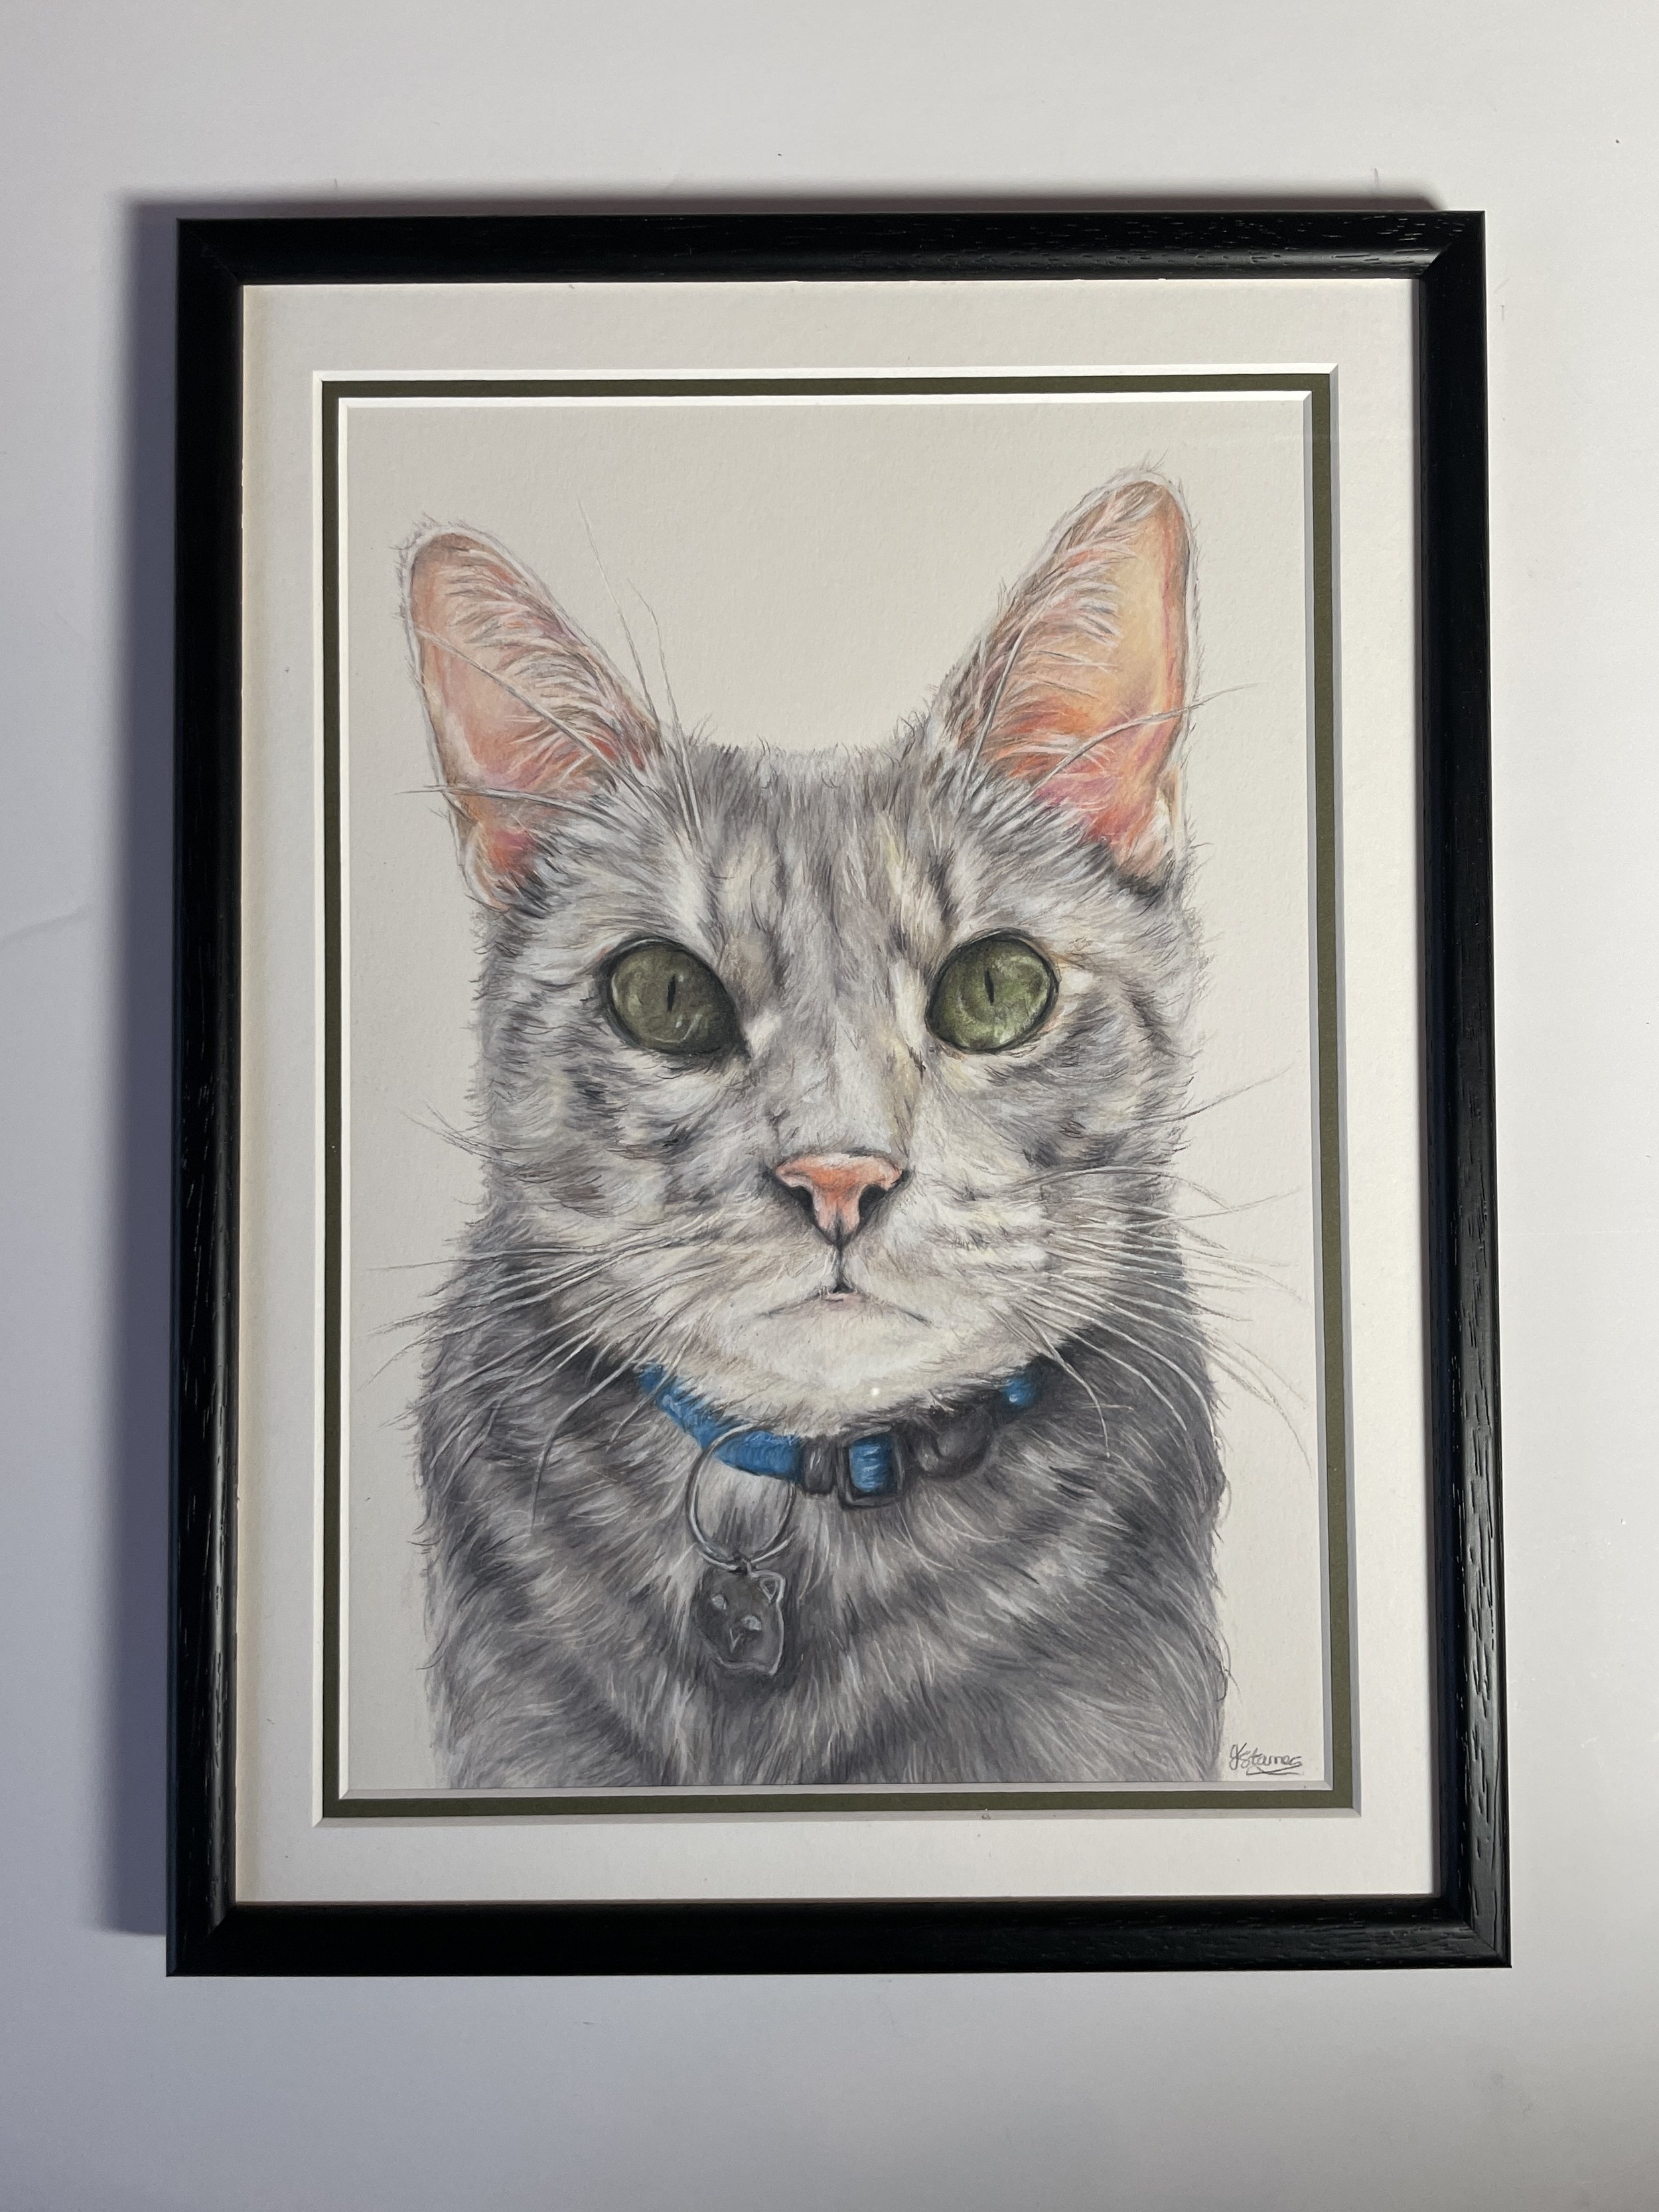
Mount / frame
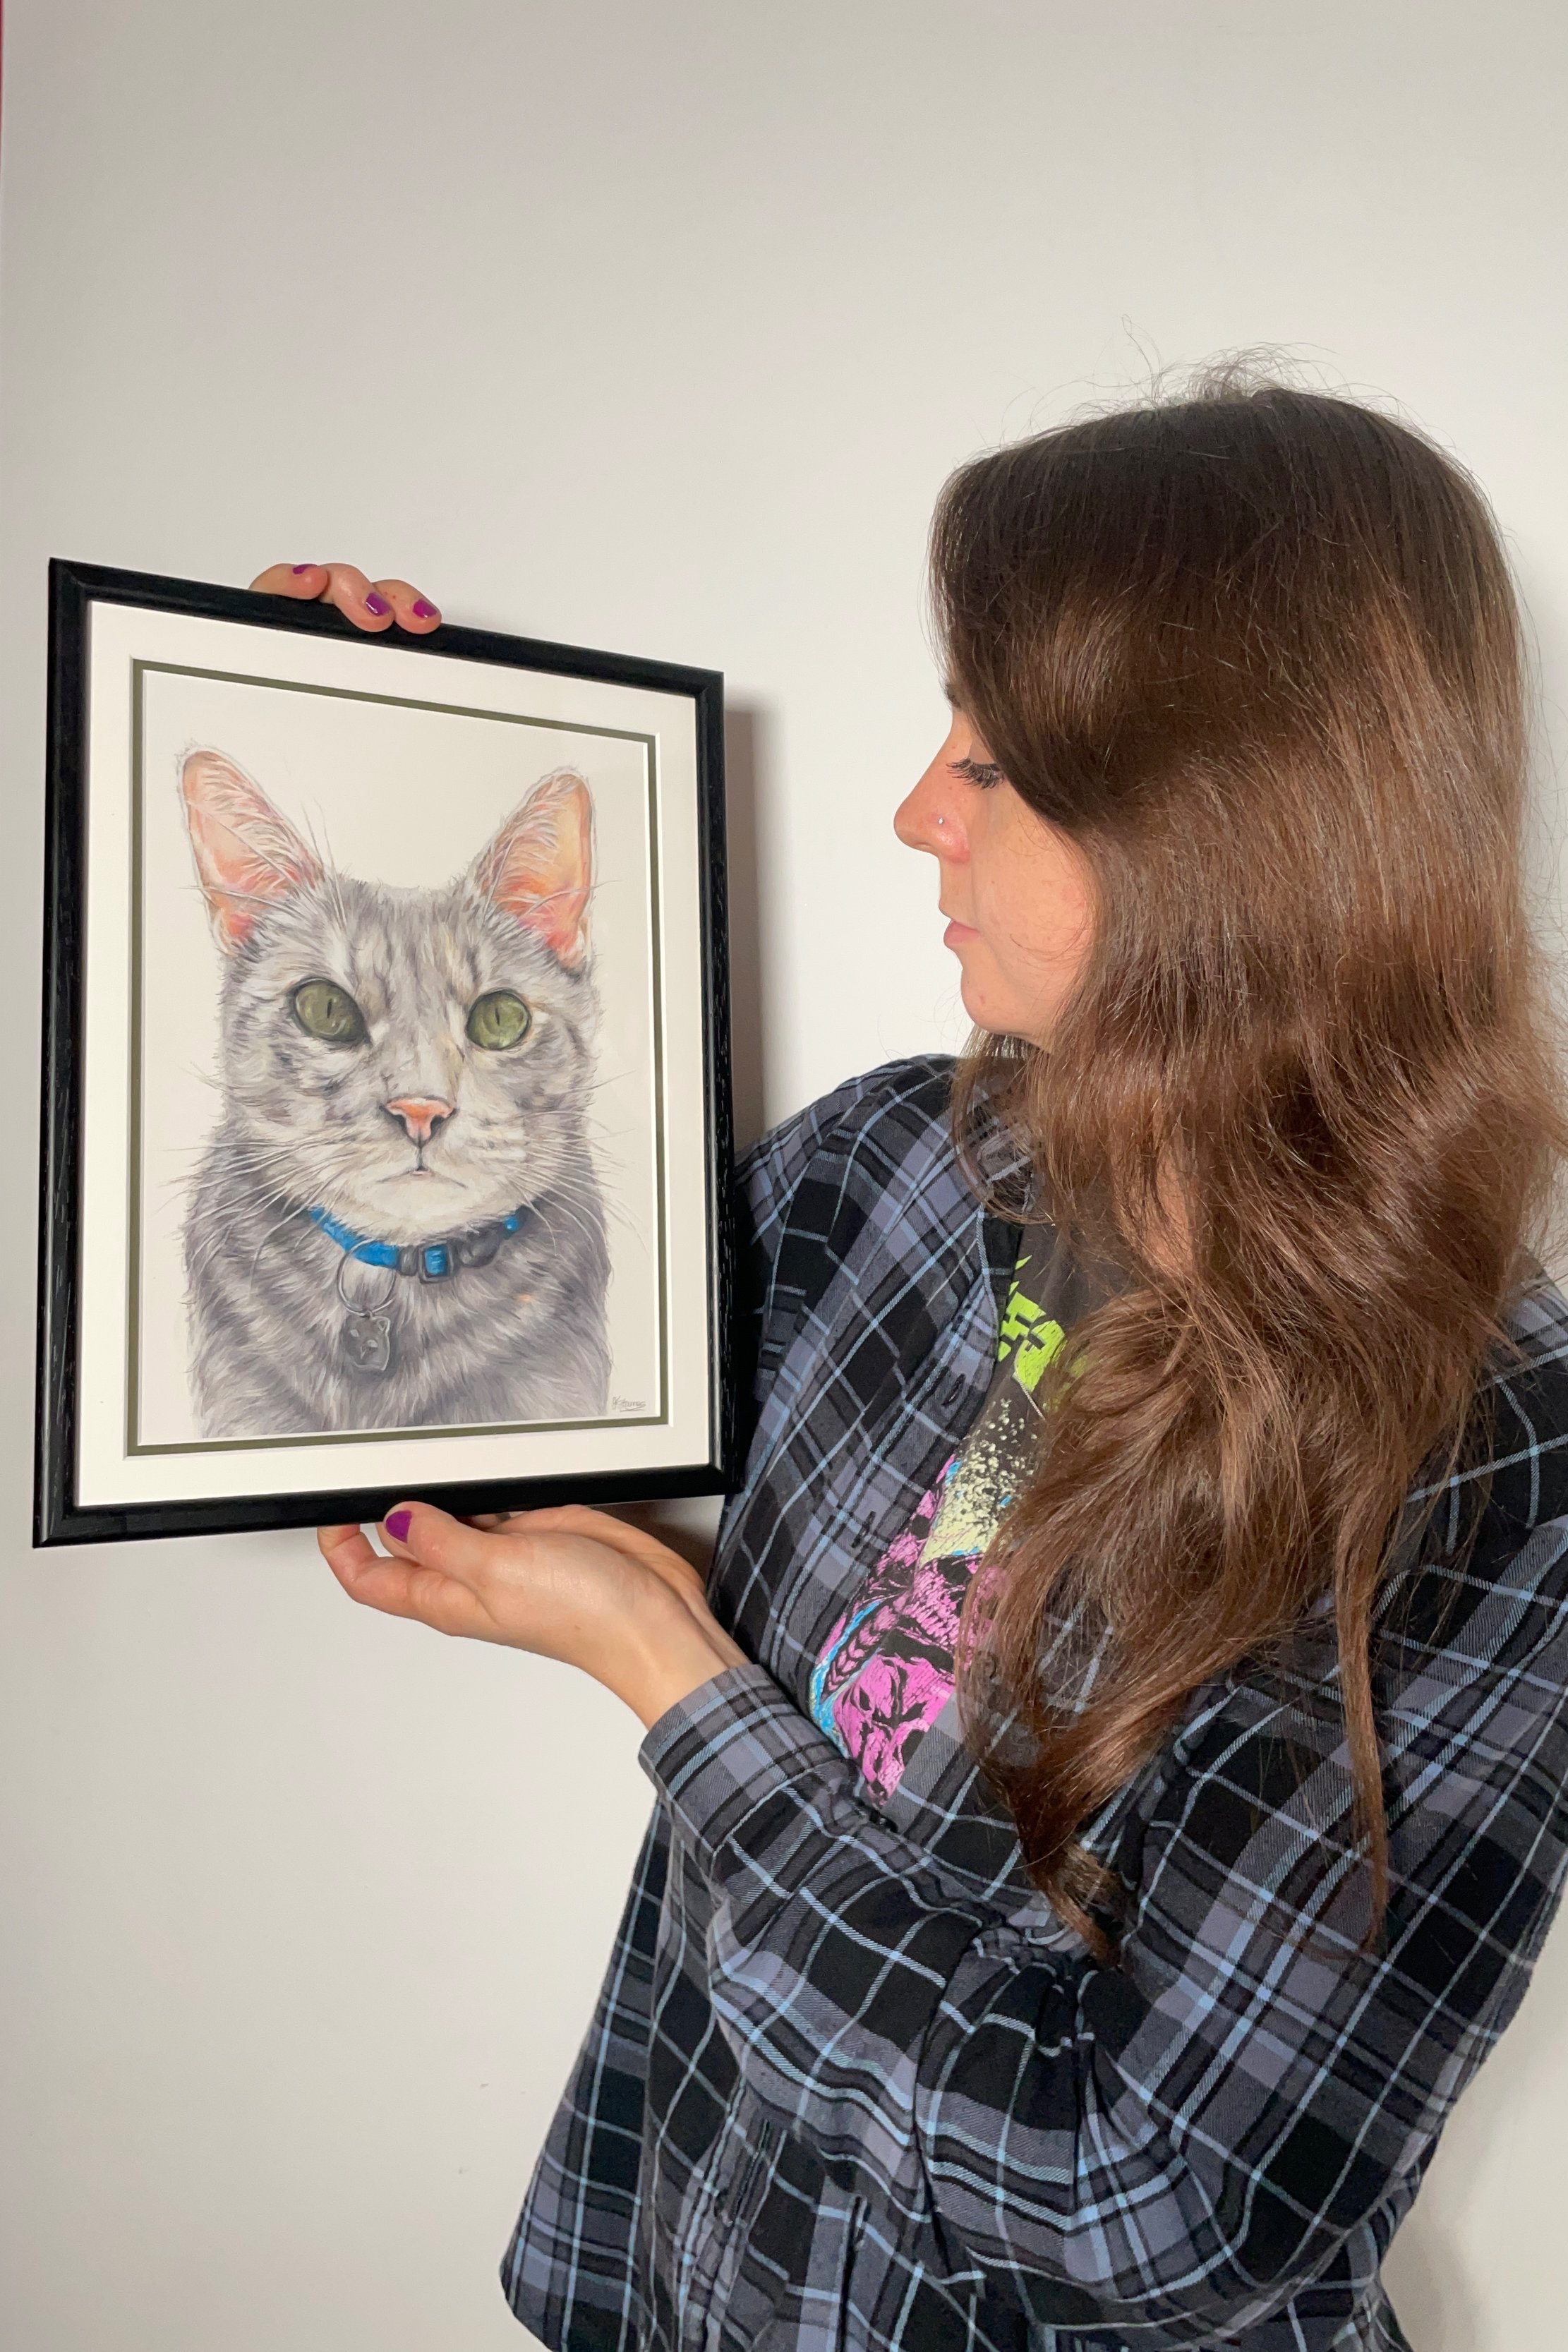
I mount all my portraits using a ‘conservation mounting‘ process to ensure the artwork is archival and will last over a lifetime. I fitted the frame my client opted for and sent over photos of the finished portrait for my client to approve. Following a happy approval I package the portrait with a lovely red ribbon and tissue paper so it’s an exciting experience to open.
Client testimonial
“I had the pleasure of stumbling across Jennifer’s work on Instagram and messaged her hoping to commission her on a portrait of my boyfriend’s ESA, Smokey. She was incredibly quick to make the artwork come to life. She took great care into her packaging to deliver from the UK all the way to Texas, USA, and even gave a video of a timelapse she carefully put together so that we could enjoy the process! On Christmas, my boyfriend was blown away by the skill Jennifer had put into creating a piece of Smokey…he stated that “this was the second best gift [he] has ever received, second to the actual cat.”
Are you interested in commissioning your own bespoke artwork? if so, please get in touch using the contact form.